

Have you ever wondered if adjusting your gym bench could significantly impact the effectiveness of your workout?
The position of your bench can make a substantial difference in the outcome of your exercises. By following six simple steps, you can ensure that your bench is optimized for maximum results.
Whether you’re aiming to target specific muscle groups or improve your overall form, getting the perfect adjustment is key.
By making these adjustments, you could unlock the full potential of your workout routine.
Table of Contents

Related Video: "How to PROPERLY Bench Press for Growth (5 Easy Steps)" by Jeremy Ethier
Main Points
– Adjusting the bench angles and height is crucial for targeting specific muscle groups and optimizing exercise effectiveness.
– Proper seat height and backrest angle provide necessary support, alignment, and stability during workouts.
– Foot positioning should be parallel to the ground and directly under the knees for balance and stability.
– Regularly test the stability, locking mechanism, and fastening of the bench to ensure a safe and secure workout environment.
Understanding the Bench Angles

To optimize your workout and target specific muscle groups, adjust the angles of your gym bench accordingly. Understanding how to adjust the bench at the gym is crucial for maximizing the effectiveness of your exercises.
Start by adjusting the bench to a flat position for exercises like chest presses and tricep dips. This position provides stability and supports proper form.
To target different muscle groups, such as the shoulders and upper chest, incline the bench at a 30-45 degree angle. This angle increases the range of motion and places more emphasis on the upper chest and shoulders during exercises like incline bench press.
For targeting the lower chest and triceps, a decline bench angle of 15-30 degrees is ideal. This angle helps in better isolation of the lower chest and triceps during exercises like decline bench press and decline push-ups.
Setting the Bench Height

Adjust the bench height to ensure proper alignment and support during your workout. The ideal bench height varies depending on the exercise you plan to perform. For exercises where you need to press the weight above your head, such as shoulder presses, the bench should be set at a height that allows your feet to be flat on the floor while maintaining a slight arch in your lower back. This position helps to establish a stable base and reduce the risk of injury.
Conversely, when performing exercises like chest presses, the bench should be adjusted to a lower height that allows you to plant your feet firmly on the ground and maintain a 90-degree angle at the knees and hips. This positioning promotes better stabilization and engagement of the chest muscles during the exercise.
Remember to always test the bench height before starting your workout to ensure that it provides the necessary support and alignment for the specific exercise you’re performing. By adjusting the bench height accordingly, you can optimize your form and maximize the effectiveness of your workout.
Adjusting the Seat Position

First, make sure the seat is at the right height for your body.
Then, adjust the angle of the backrest to support your lower back and provide stability.
Seat Height Adjustment
Positioning the seat at the correct height is crucial for maximizing the effectiveness of your workout and reducing the risk of injury. Here’s how you can adjust the seat height for an optimal workout:
1. Sit on the bench and place your feet flat on the ground.
2. Ensure that your knees are at a 90-degree angle when seated.
If your knees are higher than your hips, the seat is too low. Adjust it higher.
If your feet can’t reach the ground or your knees are lower than your hips, the seat is too high. Lower it to achieve the proper alignment.
Angle for Backrest
To achieve proper support and comfort for your back during your workout, ensure that the backrest of the gym bench is positioned at an angle that allows you to maintain a natural spinal alignment.
Adjust the backrest to an angle of around 90 degrees for exercises like shoulder presses and chest presses. This position provides optimal support for your lower back while allowing your upper back and shoulders to move freely.
For incline bench presses, adjust the backrest to an angle between 15 to 30 degrees to target the upper chest muscles effectively.
When performing exercises that require a seated position, such as bicep curls or shoulder raises, set the backrest to a slightly upright angle to maintain proper posture and support your lower back.
Proper Foot Positioning
For optimal workout effectiveness and safety, ensure that your seat is adjusted to a position that allows your feet to rest flat on the ground while maintaining a stable and balanced posture.
Follow these steps to achieve proper foot positioning:
1. Sit on the bench with your feet flat on the ground and your knees at a 90-degree angle.
2. Adjust the seat height so that your thighs are parallel to the ground when sitting.
3. Ensure that your feet are directly under your knees to maintain stability and balance.
4. Check that your lower back is fully supported by the backrest while keeping your feet firmly planted on the ground.
Aligning the Backrest Angle

Adjust the backrest angle of your gym bench to ensure proper alignment for a more effective and comfortable workout experience. The backrest angle plays a crucial role in supporting your spine and optimizing the effectiveness of your exercises.
To align the backrest angle, start by sitting on the bench and adjusting the angle until your back feels fully supported. The ideal angle will vary depending on the type of exercise you’re performing.
For chest presses, a slightly inclined angle of around 15-30 degrees can help target the upper chest muscles effectively. On the other hand, when performing shoulder presses, a near-vertical angle provides better support for your back and shoulders.
Additionally, for exercises targeting the lower chest or triceps, a declined angle of around 15-30 degrees can enhance the workout.
Always ensure that the backrest angle allows for a natural and comfortable position while maintaining proper spinal alignment. By adjusting the backrest angle according to the specific exercise, you can minimize the risk of strain or injury while maximizing the benefits of your workout.
Checking Stability and Locking Mechanism

First, make sure to check the stability of your gym bench by giving it a firm shake. If it feels wobbly or unsteady, adjust the legs or base to ensure a solid foundation.
Then, test the locking mechanism to ensure it securely holds the bench in place during your workout.
Stability Inspection
Make sure to carefully inspect the stability and locking mechanism of your gym bench before starting your workout. Regularly inspecting the stability and locking mechanism of your gym bench will help prevent accidents and ensure a safe and effective workout. Here’s how to do it:
1. Check the Base: Ensure that the legs or base of the bench are firmly in place and not wobbly. Give it a gentle shake to test stability.
2. Inspect the Locking Mechanism: If your bench has an adjustable backrest or seat, make sure the locking pins or knobs are secure and functioning properly.
3. Test the Adjustments: Adjust the bench to various angles and heights to confirm that it locks into place without slipping or shifting.
4. Examine the Overall Feel: Sit and lie down on the bench to assess its stability under your weight and movement.

Related Video 2: "The Worst Bench Press Mistakes Everyone Makes (Avoid These)" by Jeremy Ethier
Locking Mechanism Test
Inspecting the locking mechanism of your gym bench ensures that it functions securely and reliably during your workout. To test the locking mechanism, follow these simple steps:
| Step | Action |
|---|---|
| 1. Visual Inspection | Check for any visible signs of wear or damage. |
| 2. Locking Mechanism Engagement | Engage and disengage the locking mechanism to ensure smooth operation. |
| 3. Stability Test | Apply pressure to the bench to confirm that the locking mechanism holds it firmly in place. |
| 4. Repeated Locking | Lock and unlock the mechanism multiple times to check for consistency. |
| 5. Auditory Check | Listen for any unusual sounds during the locking process. |
Regularly testing your bench’s locking mechanism is crucial for preventing accidents and ensuring a safe and effective workout.
Personalizing for Comfort and Safety

To ensure a comfortable and safe workout experience, it’s important to personalize your gym bench setup to fit your specific body dimensions and exercise needs. Here are some steps to help you personalize your gym bench for optimal comfort and safety:
1. Adjust the Bench Height: Set the bench height so that your feet are flat on the floor and your knees are at a 90-degree angle when seated. This will provide stability and reduce the risk of straining your knees during exercises.
2. Position the Backrest: Customize the backrest angle to support your back comfortably during different exercises. Ensure that it provides adequate support without causing discomfort or strain.
3. Check the Padding: Make sure the bench padding is firm enough to provide support, yet comfortable enough to prevent unnecessary pressure on your body during exercises. The padding should also be free from tears or wear to prevent any accidents or discomfort.
- Secure the Bench: Double-check that all locking mechanisms and bolts are properly fastened before starting your workout to ensure the bench remains stable and secure throughout your exercise routine.
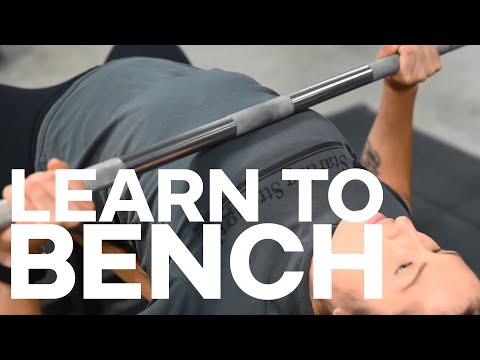
Related Video 3: "Learning to Bench Press | The Starting Strength Method" by Starting Strength
Frequently Asked Questions
Are There Any Specific Exercises That Are Not Recommended to Be Done on an Adjustable Gym Bench?
You should avoid doing exercises that require excessive instability or lack of support on an adjustable gym bench.For example, heavy lifting, such as bench press with very heavy weights, may be risky if the bench isn't securely adjusted.Additionally, exercises that involve rapid or jerky movements, such as plyometric exercises, may not be suitable on an adjustable bench as it could compromise your stability and safety.
Can I Use a Specific Type of Cushion or Padding to Make the Bench More Comfortable During Workouts?
You can definitely use a specific type of cushion or padding to make the bench more comfortable during workouts.In fact, research shows that using a comfortable cushion or padding can significantly reduce the risk of developing exercise-related discomfort or pain.By adding the right type of cushioning, you can enhance your workout experience and minimize the strain on your body.Be sure to choose a cushion or padding that provides adequate support and comfort for your specific exercises.
How Often Should I Check the Stability and Locking Mechanism of the Adjustable Gym Bench?
You should check the stability and locking mechanism of the adjustable gym bench at least once a month.Regularly inspecting these components ensures that the bench is safe to use and prevents any potential accidents or injuries during your workouts.Taking the time to verify the stability and locking mechanism will help maintain the quality and longevity of your gym bench, providing you with a safer and more effective workout experience.


